Tuesday, February 26, 2013

Spring Pick

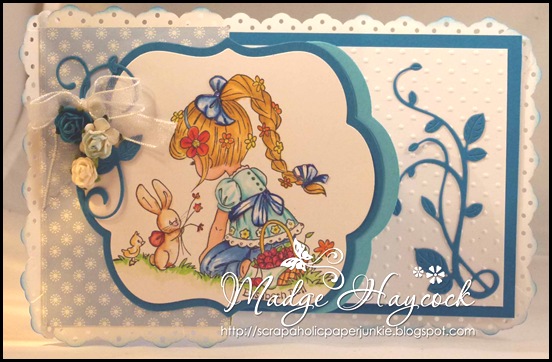
Hi all, for Episode #3 of Try It Tuesday!

I've a project to show you today using one of the beautiful Whimsy February releases, just in time for Easter and to give us all a long-awaited glimpse of Spring.

  extended3P1020114 

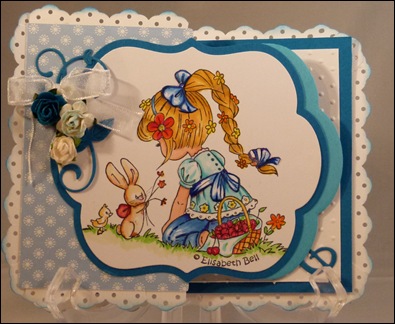
My card is a side ways Easel Card, giving me more real estate on the inside for a sentiment, (which will be added later).

Materials used: 

Spring Pick - Little Cottage Cuties, Vines Die Set - Whimsy Shapeology, EK Success Border Punch, (but wouldn't this look beautiful? Lace Doily Corner 1!!!)  Copic Markers, Memento Tuxedo black ink, Tim Holtz "Broken Glass" Distress Ink, Cardstock and DP from Stash.

I promised to show you how to save money with your trusty little craft hammer - but due to technical problems with me losing my pictures, I'll have to explain it verbally.

We've all encountered the added costs at the Post Office, haven't we?  It seems that the added depth of our beautifully adorned cards are going to cost us money.  Since the New Year, I've been trying to make my cards flatter, less embellishments, and of course trying to find an alternative to those beautiful flowers we have all grown to love.

"Smash" those embellishments with your trusty little craft hammer...... I don't mean smash them flat, but smash them gently to get rid of the bulk.  ie:  knots and bows, flowers, brads and paper beads.  I did have examples of before and after pictures, but my computer has put them somewhere - where, I cannot find:(

Remember, Stamp up a storm, ink up a wish and send it on to someone to brighten their day.

Rubber hugz, whimsy wishes,

madge0902 (1)

Thursday, February 21, 2013

T.....is for True Friend


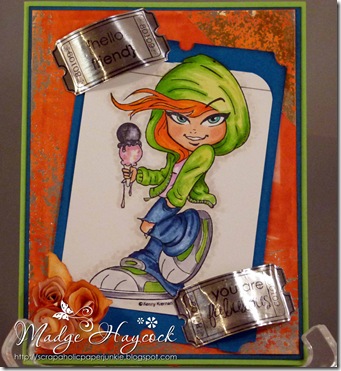
I have used a Kenny K image called "Troublemaker".  

P1020077 copy

Rainbow Echo Designs Sentiment Set

Whimsy Shapeology Ticket Die

Copic Markers:  Skin:  E01, E13, E93, R20, R22;  Hair:  YR07, YR16, R02;

Clothes:  YG00, YG05, YG07,  RV04, B23, B34, B37, B39; Shading C1, W1

From stash:  card stock,  Sakura Glitter Pen, Metal, Silver EP, Versamark, Memento Black Tuxedo ink, StazOn Jet Black. I will be entering this into the Whimsy Inspirational Challenge #56 - add some metal

Tuesday, February 19, 2013

Whimsy Stamps - "Try It Tuesday - #2

Hi all, Madge here for the second edition of "Try it Tuesday" for Whimsy Stamps!

Don't we all just love Flourishes!  I'm guilty of not using them enough - or even to their full potential.  But I LOVE them, and they are so versatile and look so elegant and classy. 

P1010356

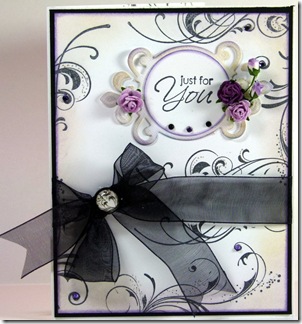
Here is a card from my archives. Most of my cards are made for a special person, this one was no exception - I found it really difficult to part with, but it went to a good and caring home.  (And is probably residing in a shoebox somewhere in storage).

One of the stamps sets that I absolutely adore is  "Lavish Flourishes, Rainbow Echo Designs"  

Today, I'm going to show you how to use those flourishes in different ways to get them onto your desk, inked up and ready to use for quick elegant cards.

    ~   ~   ~    ~

Do you love those fancy pearl or gem flourishes that come on a sheet of acetate ready to apply?  Think about stamping a Lavish Flourish onto card stock with Versamark or colored ink. 

Apply  glue to where you want to place your pearls or gems for the same, and more economical substitute.P1020087 copy

A Lavish Flourish stamp along with Versamark and White

P1020085 copy

embossing powder can take your breath away when sponged with a color.

My sample is simple - but think of the possibilities.


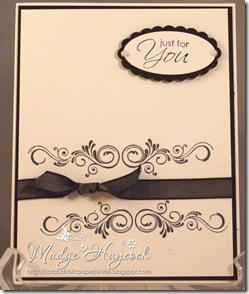
Another quick sample of using a flourish is to mirror image P1020084 copy the flourish and separate it with a strip of paper or a knotted ribbon.

I've used cream and black for my sample.


If you feel you've been cheated this week not seeing an image card - I have used a Kenny K image called "Troublemaker".  

P1020077 copy

Rainbow Echo Designs Sentiment Set

Whimsy Shapeology Ticket Die

Copic Markers:  Skin:  E01, E13, E93, R20, R22;  Hair:  YR07, YR16, R02;

Clothes:  YG00, YG05, YG07,  RV04, B23, B34, B37, B39; Shading C1, W1

From stash:  card stock,  Sakura Glitter Pen, Metal, Silver EP, Versamark, Memento Black Tuxedo ink, StazOn Jet Black,

Stay tuned next week when I will show you how your crafting hammer can save you $$$.

Thanks for joining us for "Try It Tuesday " -- tomorrow Wed. The 20th is New Release Day!!  You will want to check in to see all the newest  stamps and dies and the amazing DT creations! 

Rubber hugz, Whimsy Wishes,


 madge0902 (1)

Wednesday, February 13, 2013

Tilda with Hearts

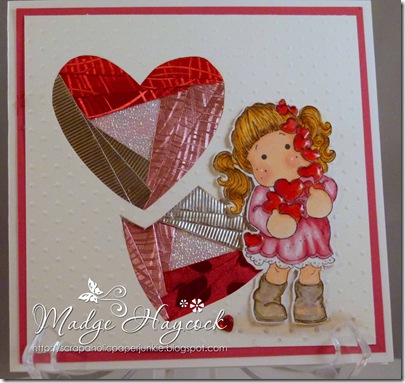
Hi all,  this is a card I made for a gal who has a Birthday on Valentine's Day and will be sent on behalf of the Magnolia Birthday Club with all the Best Wishes to go with it.  Hope she gets double chocolate!!P1020076 copy
I colored Tilda with Hearts with copics, fussy cut her out and popped her onto an iris folded double heart card which had been embossed with dots.  The hearts Tilda is holding have been glazed with glossy accents and a red heart gem has been placed on the ground to make it seem like she dropped one.
Remember, stamp up a storm, ink up a wish and send it on to someone to make their day.
Challenges entered:
Magnolia-licious Birthday Challenge (Valentine Birthday Card)
OCS - All About Love

Rubber hugz, Whimsy Wishes,
madge0902 (1)

Monday, February 11, 2013

Great News to Share and an "FBS" Card and Kit

Hi all,  to those of you who do pop in from time-to-time, I have fantastic news to share!!  I have been given the honor to design for a Newsletter for WHIMSY STAMPS!  Yea!!  I've been sitting on the news for a couple of weeks - and I'm a little excited!!
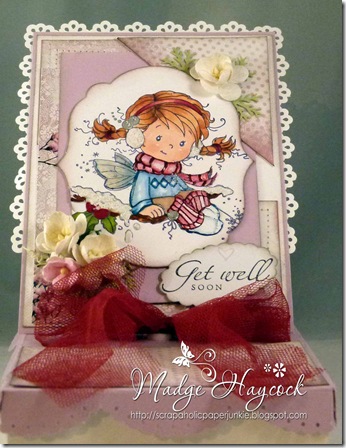
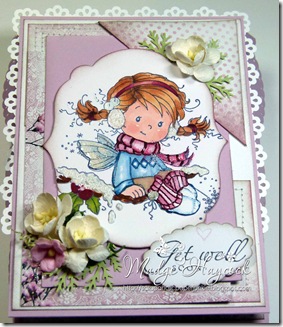
My first post for the Newsletter and I'm a wee bit nervous (ok, a lot).  Anxiety stress, is the worse kind....lol. Here in the Okanagan Valley, easel openwe have beautiful sunny days - with snow all around us - and later in the season we even have flowers blooming with snow heaped up in our yards.  Bizarre!  The end of winter is also the end of flu and cold season.  I've chosen to make a "FBS" kit.  FBS, you ask?  Feel Better Soon.  I've topped it with an easel card using the absolutely adorable stamp, Holly", before I put it aside for the season.  She is also a little fairy.... and the mere thought of a fairy makes one feel better in an instant - especially this little cutie.
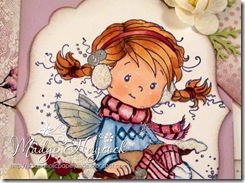
You might notice the difference in my image from the original stamp - because I did Mirror image stamping to reverse the image.  
image close up
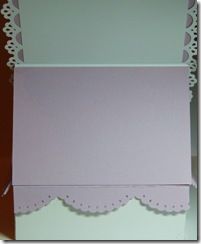
I shall skip the part of how I constructed the front as it is quite self-explanatory.  easel down
I had a "FBS" kit in mind when I created this project.  I downloaded some beautiful papers from Whimsy's digital paper collection "Digital Magnolia Spring Blossom Papers", from the ever-so-talented Michele R.  Oh my, soft colors, subtle and beautiful!  Talk about instant gratification!!
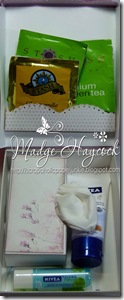
A box to fill with "FB" stuff was next.  Kleenex, hand cream, lip balm, and stash teas were the items that came to mind.  inside box Some careful measuring, and not so careful cutting, gave me a box bottom that fell 1/8" short of the little pkt. of Kleenex.  Not to worry - the Kleenex fit sideways.
Note:  I made a little wrapper from more of the Spring Blossom papers to pretty up the Kleenex.
Tip:  Perfect weight for a sturdy box bottom is a cereal box or the "lightweight chipboard" from the back of those 12" x 12" paper pads. 
My box measures 4 1/4" x 6" x 1 1/2, giving me enough real estate to put my items into.  (4 1/2" would have been better) (groan).
I wanted a drop-down lid that would act as a cover to P1020068fall into place over the contents.  2 1/8" was added to both sides of the box measurements. I then scored the box measurement in the center of the card stock.  I lined up a border punch (EK Success), folded the corners, and glued them to make a fitted lid (like a fitted bedspread).  (I added the flatback pearls to cover up a small rip).
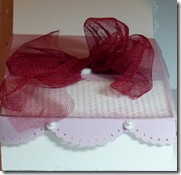
The back of the box was hinged to the back of the easel card to join them. P1020072 The top was decorated with more of those luscious papers of Michele's and a soft cranberry toule bow was added on top of a pop dot for a "stopper".
Supplies used:
Xpress it blending card
Memento Tuxedo Black Ink
Copic Markers: Skin:  R00, E11, R20  Hair:  E30, E31, E34, E37  Scarf & warmers:  R81, R83, R39  Sweater:  B91, B93, C1  Leaves & Branch:  YG63, YG03,  E53, E49,
Misc. (wings)  Sakura Stardust Pen, (snow) Matte White Glossy Accents and White Embossing Powder, SU die cut; Get Well Stamp, fern punch, MS Border punch, EK Success border punch, card stock from stash, sewing machine.
I hope you enjoy my finished project - I had lots of fun (and frustration) getting it to work.  A tree was definitely harmed in the making of this project.  lol
"Remember, stamp up a storm, ink up a wish and send it on to someone to make their day".madge0902 (1)


Mirror image stamping

  • Gather the following and have them in front of you.
Well-inked stamp pad, acetate, (sized to fit your stamp), white cardstock and your stamp ready to ink up.
You must act quickly to get a clear stamped image.
  • Lay your acetate right beside the cardstock and ink up your image.
  • Quickly stamp onto the acetate (being careful not to wiggle the stamp).
  • Flip the acetate onto the cardstock and burnish with your finger (do not wiggle acetate or the paper).
  • Remove the acetate and "voila", your image is reversed, ready to color.