Wednesday, March 30, 2011

2012 Calendar Tutorial

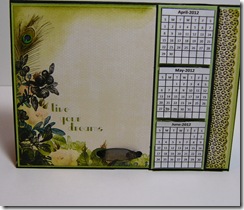
Hi all,  Madge here with a Christmas Project Tutorial to get you started on gifts for special people.  A homemade gift is straight from the heart and shows that you have taken the time to make something special.  I have been making these calendars for about 3 years. Last year I made 30 to give as a “Christmas Card” to my stamping buddies.P1120157
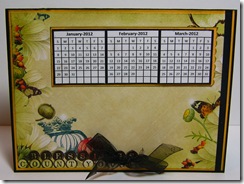
You can adapt this to any size you would like, but for this sample / calendar, I have made it A4 size  4 1/4” x 5 1/2”.

Materials:   Sturdy cardstock:  5 1/2” x 8 1/2” (or 6” x 12” or 5” x 10”).  Length is double desired height.                 

         2012 file  (Print onto white cardstock, and cut apart).

          Unfortunately, my calendar pdf could not be uploaded - if you print the above at 6 columns and “gray font”. You will get a good replica.

         4 designer papers:  4” x 5 1/4”   (Good way to use up those Designer Paper pieces & scraps).

P1120152I used 4 wonderful 6” x 6” pages from Webster’s Pages. purchased at OCS  Lora has a wonderful selection of 6” x 6” pads.

 4 Mats:  To coordinate with papers chosen. (scraps! scraps! scraps!)

Assorted embellishments:  stamps, inks, punchies, Designer Papers.  Scraps! Scraps! Scraps! 

14“ Soft ribbon  (ie: satin, organza)P1120150

1/4” hole punch or anywhere punch

Strong adhesive to guarantee your calendar can                  withstand a year of being displayed.

Lets get started:

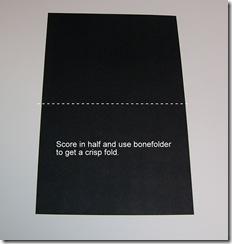
 Step One:   Score cardstock in half along longest edge  (8 1/2”)  This will give you 4 “pages”.

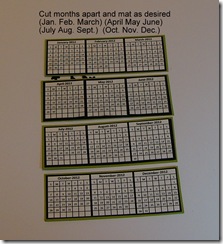
Step Two:  Cut out each month, and mat in groups of 3.

Jan. Feb. March  / April May June / July Aug. Sept. / Oct. Nov. Dec.

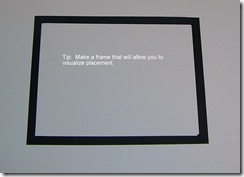
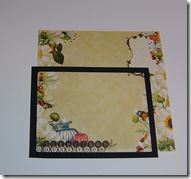
 Step Three:   (Tip) I make a 1/4” frame to visualize the placement I want for my “page” layout.P1120151

 P1120155

P1120154


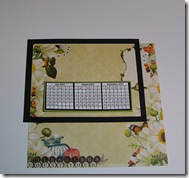
Step Three:   Cut Designer paper 1/4” smaller than your “page”   ie:  4” x 5 1/4”.  Adhere to “page”.


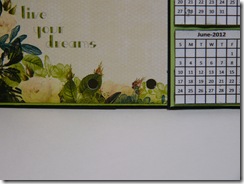
 Step Four:   Add matted months and any embellishments.P1120145

(Let your creativity run wild).  P1120159


 Step Five:  Punch 2 holes about 1/2” apart on the centre bottom of your pages.P1120160


 Step Six:  With Jan. Feb. Mar. facing you - thread your ribbon into the two holes, leave 1 1/4” on the pieces in the middle, and tie a bow.

P1120158Your calendar will be freestanding and ready to give to that special friend on your list.

P.S.  Don’t forget to sign or initial each page.   Enjoy!

If you have any questions, email me at madgeh@shaw.ca, I’d be happy to help you.

Be sure to check in at the  OCS challenge for April  and a chance to win $$$.  See you there!

 siggyhaycock

Wednesday, March 23, 2011

Bernadette Admiring Spring Flowers

Hi all,  Madge here once again.  Today, I’m going to show you what I’ve created using one of the many gorgeous images from Stampavie, Sarah Kay’s wonderful “Bernadette Admiring Spring Flowers, available at One Crazy Stamper.
If you follow along with OCS’s challenges, you’ll know that this month our DT Leader Jacilynn supplied us with an awesome sketch.  Well,  to keep up with the challenge, my card has followed her sketch (well, sorta / kinda).  


I turned it into a platform for a Round Easel Card.  (The blue background is the mat to my little Scor-Buddy, which I just L-O-V-E.)
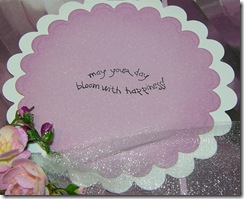
Inside, “may your day bloom with happiness”, is stamped.P1120131


I really loved the way this card came together and even used a piece of patterned paper that has been kicking around forever – hundreds of pieces of cardstock and dp’s and this is the piece that saved the day!
Supplies used:  Copics, (too many to mention), Spellbinders Scalloped Circle dies, MS border punch, Prima flowers, MS Fern punch, Bazill cardstock, and Organza Ribbon and butterfly charm from stash.
Next week, I will be doing a tutorial for a Christmas Gift that you may like to see, along with a pdf to help you along.  So, see you next week, same time, same station.
~ rubber hugs, inky wishes ~ 
 

Saturday, March 19, 2011

Can Spring be far away?

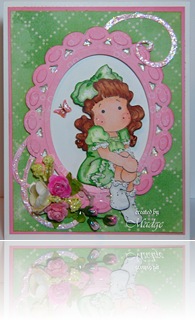
Here Tilda sits in a ray of sunshine, thinking that Spring is only a couple of days away.  Yesterday was blustery and cold, today, sunny and warm, what is it going to be?P1120124

I love this image of Tilda with Big Bow.  I used copics to color her with thoughts of spring.  Pink and Green came to mind.

I used the Beaded Oval Spellbinders and cut the center out with a basic oval die, mounted it over a larger white oval and made a little ledge for Tilda to sit on. The Doohicky Swirl is coated with Stickles, as are the flowers

I’m always reluctant to send flowers in the mail, but I have learned that if I coat them with Glossy Accents, it hardens the fibers and they don’t arrive looking like they have been beaten with a club.  This card is for a very dear friend, who has been going through a tough time lately.  The inside says -- “To Cheer You”.

I’m entering this card into the

Magnolia-licious home card challenge

Little Claire’s  pink & green

~ Rubber hugs, inky wishes ~

siggyhaycock

Wednesday, March 16, 2011

April Showers Bring May Flowers

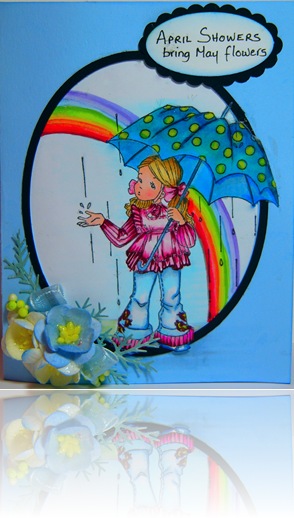
Hi all,  Madge here again.  Today I’m using the cute little image from Whiff of Joy by Elizabeth Bell which can be found at One Crazy Stamper.  These gorgeous images are whimsical, yet detail perfect.

P1120123

I used copics to color the image, too many to list.  I apologize for the picture as my computer had a much needed “surgery” and I’ve lost my photo editing software (temporarily).  Also lost all my email contacts / and emails…….  (ugh, grrrr, rant, rave). Hopefully it will be restored soon.

Supplies used:  WOJ Umbrella Girl, Copics,  Glossy Accents, Oval Nestabilities,  Wild Orchid flowers, MS fern punch and misc. cardstock. 

Hope you’ve submitted a card for the OCS challenge for a chance to win $$$.  Can’t wait to see what you come up with.

~ rubber hugs, inky wishes ~

siggyhaycock

Wednesday, March 9, 2011

Teddy Bear Picnic

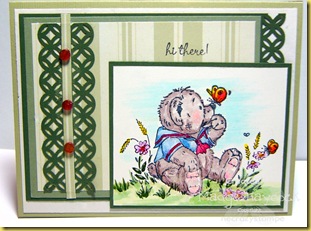
Hi  all,  Madge here.  I’ve chosen to share a card with you today using the  adorable set by Penny Black called “Teddy & Company  from http://onecrazystamper.com/ .P1120109 copy

It may be still cold and bleak looking outside, but we may as well dream “spring”.

P1120110A little over a year ago I was asking myself if copic markers were worth their “over-inflated” pricing.  After a year of playing with them, the answer is “YES”.  I love the way they blend, I love the way the smallest most minute touch lends itself to colour.  YES, my friends they are worth every penny!  Check out Lora’s prices at the OCS Shop ….they are so inexpensive! 

OCS also has a contest for March involving a sketch – submit your interpretation of the sketch and you will have a chance to win $$$ at Lora’s shop.  Can’t wait to see your submission!

Supplies used:  Teddy & Co., Copics, MS punch, Dew Drops, SU cardstock and paper from unknown source.

Keep stamping, and keep smiling – Spring will be here soon!

~ Rubber hugs, inky wishes ~ siggyhaycock