Wednesday, December 19, 2012

Have a Jolly "Holly" Christmas

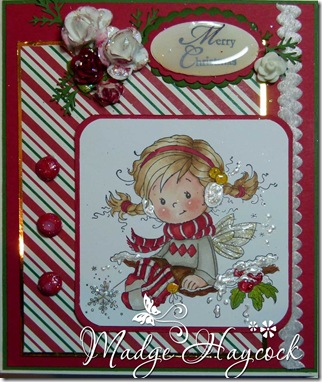
Hi all, Madge here for another Wonderful Wednesday at OCS.  I'm in panics-ville mode as the "Most Happiest Day of the Year" approaches.  I've decided to kill two birds with one  stone for my post today........  Double Duty, so to speak.P1010902 copy
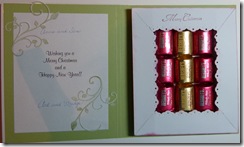
I've chosen the beautiful  Whimsy Stamp, "Holly" - available at OCS and turned her into a Nugget Candy Card filled with a Hershey's Nuggets surprise for a very sweet friend.  This is #9 with three more to make before "the big day".  These will be hand delivered - unlike two that were mailed!  Yikes, that was expensive!
I Stamped the image with Memento Tuxedo black ink onto Xpress It blend Cardstock and colored it with my favorite medium.....copic markers.  Cardstock layers are from a stash of paper scraps that I have been neglecting to use.  (I won't bore you with details).
Whimsy's "Holly" stampCopic Markers; Memento Tuxedo Black ink; P1010890Viva Decor pen (snow); Cherry Lynn Fanciful Flourish;Glossy Accents; Stickles (on flowers) and Brads, flowers and punchies from stash.
I apologize, but once again my links do not seem to be working without giving me an error message...... grrrrr. 
I want to wish all of you  A Very Merry Christmas  - from our house to yours. See you here next week.
siggyhaycock

Tuesday, December 11, 2012

Dress it up or Dress it down

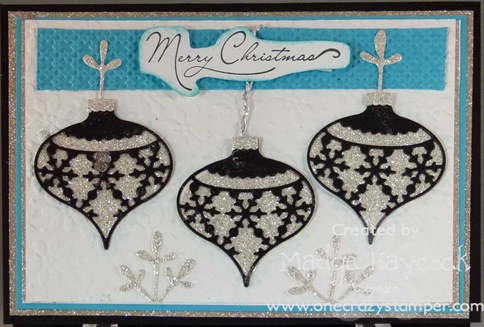
Hi all, Madge here for a Quick Christmas Card.  Are you feeling the pressure yet??  I am, with still a few special cards to make, baking, cleaning, etc. etc.  I have a Quick Christmas Card for you today.P1010882 copy
The only stamping involved is the Merry Christmas sentiment.
Die Cuts are Memory Box Dies, which are overlaid.  I used double-sided tape on the ornament base, added Glitter Ritz glitter and pressed the overlay on top. I did the same for the silver edging.  More frugal than purchasing those expensive sparkle sheets.
Until next time.   hugz, Madge

Monday, November 26, 2012

Krafty Kate


Hi all, Madge here with a project using "Krafty Kate"   How appropriate for that "crafty person" on your  card list any time of the year!
Materials used:  Xpress It Blend Cardstock; Tuxedo Black Memento Ink; Tim Holtz, Brushed Corduroy Distress Ink; Copic Markers:  R00, E11, R20, W0, W2, Y26, Y28, R39, R22, YG91.YG93,YG95,YG97, BG00; White gel pen; Ice White Viva Decor Pearl PenSpellbinders, Lables 23; Papers from BoBunny "Noel" collection. Buttons, snowflake punch and ribbon from stash.
I am entering the following challenges:
Papertake Weekly challenge - Ribbons and Pearls
TTCRD 46 - anything goes 
Challenges 4 Everybody - anything goes 
Loves  Rubber Stamps - anything goes
siggyhaycock

Wednesday, November 21, 2012

Whimsy's Holly

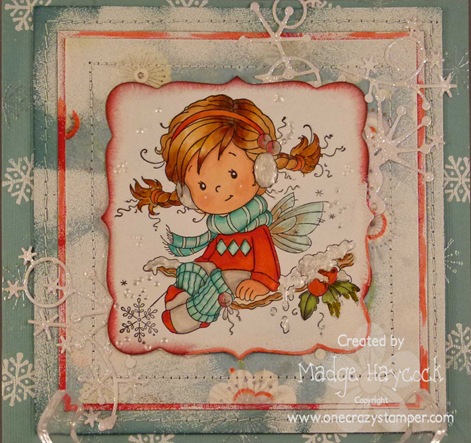
Hi all,  Madge here for another Wonderful Wednesday.  I was very reluctant to post my project for this week as Shari (our Terrific Tuesday girl), did a absolutely marvelous project using the same image.  (We both have excellent taste - !!  Amazing how two images the same can turn out so differently. 
I stamped my image on Copic Xpress It Blend Cardstock, with Tuxedo Black Memeno ink, colored it with copics and die cut the image.  Barn Door distress ink was sponged onto the die cut to give it a bit of color.  I also added some machine sewing and then sponged on Versamark and applied White Embossing Powder.
P1010846 copy
Materials used:
Holly from Whimsy Stamps
Xpress It Blend Cardstock;
Memento Tuxedo Black ink
Copic Sketch Markers
 Tim Holtz Distress Ink (Barn Door)
White Viva Decor pen;
Spellbinders and Memory Box dies
White Embossing Powder

Happy Stamping!

Wednesday, November 14, 2012

Choppers in Motion Tutorial

Hi all, for another Wednesday at One Crazy Stamper.  Since it is my turn to post a tutorial for the OCS DT, I have chosen to show you what I did to create a "motion" scene.

I am using a High Hopes stamp called "Choppers Chillaxin" available at One Crazy Stamper for an insanely low price, as are all One Crazy Stamper's items.   6 chillax copy
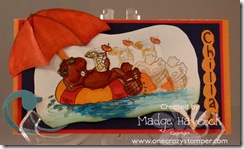
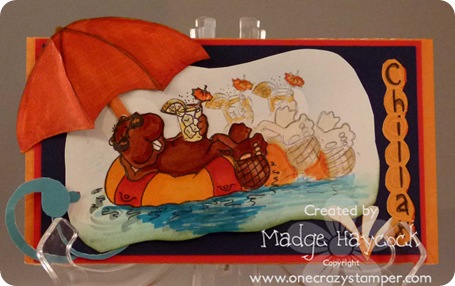
Here is my finished card.  I kept it very simple with layers and a few embellishments. 

Now, on with the Tutorial. 


1)  Stamp your image on far right or far left of piece of white Cardstock  (depending on where you want your image to finish up).
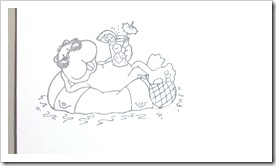
1)  Stamp your image on far left or far right depending on where you want your image to end up.


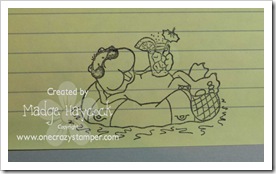
2)  Stamp your image onto a Post-it Note making sure you stamp on the top side of the sticky part. (this will allow you to temporarily adhere your mask to the stamped image.2 chillax copy


3)  Cut the right or left side of your mask depending on which side you want your image to come from.3 chillax copy  No need to be perfect - just a "roughy cut outside the lines".
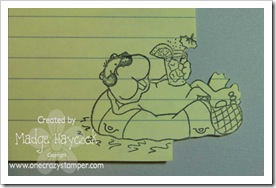


4)  Place your mask over your stamped image.4 chillax
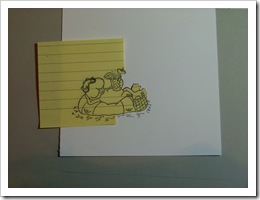


5)  There is no need to re-ink your stamp for your second image - just "huff" on the ink to refresh it.  Stamp your second image.   I didn't align my images as I wanted them to appear to move and jiggle up and down with the motion of the waves.5) Instead of reinking your stamp - huff on it to get a slightly lighter image than the first one.  Repeat for third image.
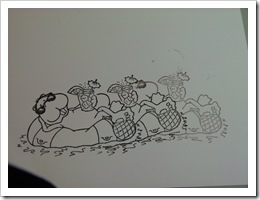
6)  Stamp your image for the 3rd time - huffing on your stamp once again.  The image does not have to be "all there", it should be just a blur.

7)  Proceed to color your image.  The first image you stamped will be in full color.   P1010868
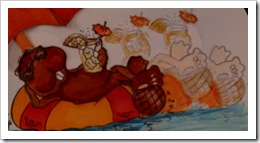
The second image will be in lighter, and the third image will be a "blur of color", very pale in comparison to the first image.

Here is a larger version of my finished card.  I kept the embellishments very simple and purposely rough cut around the image and placed it tilted on the paper to give the illusion of bouncing around on the waves.6 chillax copy
I hope you've enjoyed my tutorial, if you have any questions, feel free to email me. 

Materials: High Hopes Choppers Chillaxin stamp, Memento Tuxedo Black ink, Xpress It Blend cardstock, Copic Markers: Water;  B000, B02. B97, B95  Chopper;  E47, E39, E15, E70, E71     Tube;  YR000, YR21, YR12, E11, YR38, R08, R14

siggyhaycock

Thursday, November 1, 2012

Silver Fairy

Hi all, for a NEW Challenge at One Crazy Stamper and the chance for you to show us your stuff!!  The Challenge is "anything goes"!!!  Can't wait to see what you submit.
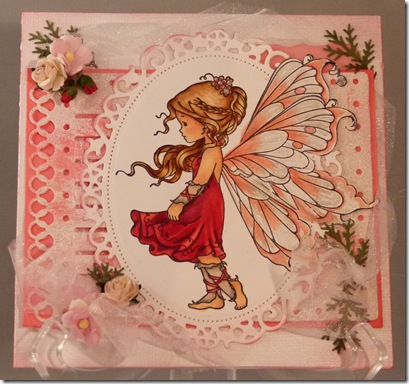
My project for this new challenge is using a Whimsy Stamp called Silver Fairy.
I stamped the image onto Xpress It Blend Cardstock, colored her with copics, and die cut in around the image leaving the wings free. P1010809 Speaking of wings - she does have more than the image because I masked the main image and stamped her wings over top, giving her lots of beautiful wings - and more for me to color. 
The Spellbinders Die Cuts I used are:  A-2 Fancy Ribbon Threader and Floral Ovals.  I loved coloring this image - using reds is not as easy as the other colors.  The picture shows a beige on her wings, but it is actually a Stardust pen, which shows as a hint of glimmer IRL.   Loved the way she turned out. I swiped my VersaMark pad over the  Fancy Ribbon Threader die, and heat embossed it with White.   It is hard to see in the picture, but I intertwined a clear organza ribbon around the matted die cut, nipping it under the die cut at intervals to give it a twisted appearance and tying the ends into a bow in the lower left corner.  (I thought the coral was a bit too stark.  Of course, it wouldn't be a frilly, fancy card without flowers and sprigs of green!!  The card base (5 1/2 x 11 - folded in half) was sponged with a coral to blend in.
siggyhaycock

Wednesday, October 24, 2012

Ellie Loves Sunflowers

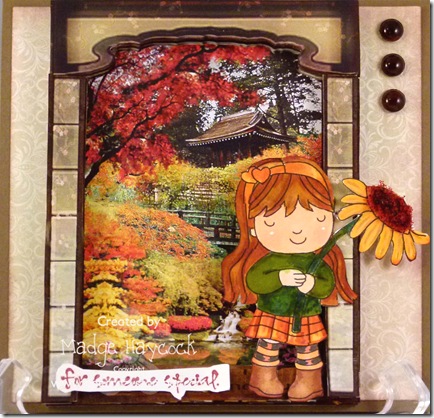
For an autumn project I've chosen a stamp from Your Next Stamp (YNS) called P1010772 copy"Ellie Loves Sunflowers".  Materials used:  Xpress It Blend Cardstock, Ranger Archival Ink, Copic Markers, Flower Soft, 3D Frame from Flower Soft, Acetate for window, Pop Dots, Large Flatback Pearls (Colored with Copic Markers); Cardstock from stash.  All of the above items are available from One Crazy Stampe.
(Note:  I really struggled with this blog entry, (big time), only to find that my computer had a ton of "infractions" on it - All fixed now - (big sigh of relief). 

siggyhaycock

Wednesday, October 17, 2012

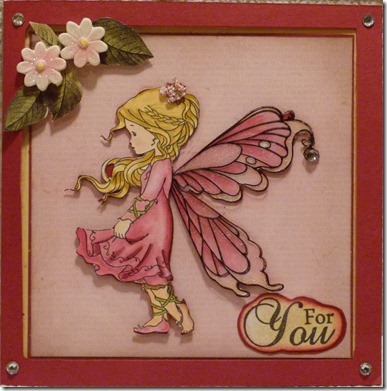
Silver Fairy in pink

Hi all, for another WET Wonderful Wednesday.  I think the skies have opened up and dumped our allotted maximum rainfall for the last 4 months all in one day.  Better wet than white though~!!P1010762
’ve chosen a Whimsy Stamp called “Silver Fairy” but decided to pretty her up with pink.  To start with, the image was stamped onto Xpress It Blend cardstock, colored, fussy cut out, mounted onto a transparency.  I cut a frame from the cardbase using Cherry Cobbler and mounted the transparency onto the inside of the frame.  The inside of the base was matted in Yellow and a Pink DSP.  Flowers and leaves were added to the outside frame to add some dimension.  The “For You” was adhered to the inside mat.  P1010769 
We left home very rushed, and I only packed a few things to complete this card.  You will have to excuse the poor photography, as I only have my camera and the lighting is not the best.
Til Next Time.
Madge

Wednesday, October 10, 2012

Fall is in the Air

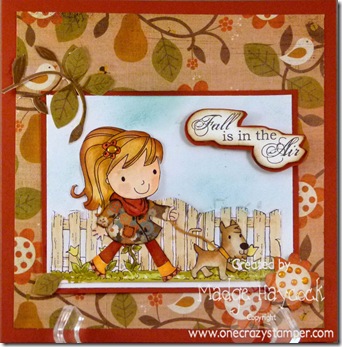
Fall is definitely in the air in our neck of the woods.  There is that crispness about the temperature.  For my project for OCS, I've chosen to use the YNS stamp "Ellie loves walking  her dog"  and the fence / grass from High Hopes' Garden Gate Background. Both images were stamped onto XPress-It Blend Cardstock with Tuxedo Black Momento Ink and then colored with P1010696 copyCopic Markers
I chose DP from Basic Grey's Pyrus Collection, with the rich warm colors of Autumn. 
This month's challenge at OCS is under way with a "Clear or Transparent" challenge for all of you.  Go to the OCS DT blog and scroll down to add your creation.  Hope to see you there!!siggyhaycock

Wednesday, September 26, 2012

Summer Flower Tilda

Hi all,  Madge here with a Magnolia "Summer Flower Tilda".  I absolutely love these little darlin's.
P1010686 copyI stamped the image onto XPressIt Blend Cardstock with Archaival Black, and colored her with Copics. I added glitter and Glossy Accents to her wings and flower.  Her little hair band was accented with some metallic threads and a button. Buttons were also added to the Marianne Die, which was also sponged with ink.
Still working on the shading / folds - have been away from coloring for a while.
I'm entering this card into the following challenges:
 Tilda's Town - Clean & Simple or Fussy & Fancy
Magnolia-licious Highlights Challenge - buttons
madge0902 (1)

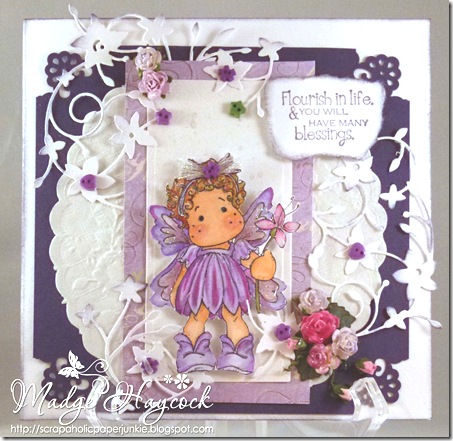
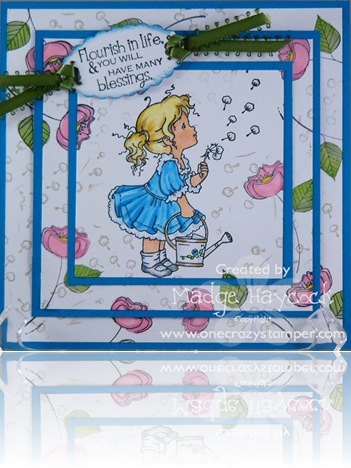
YNS – Flourish in Life, Hero Arts, Memory Box Vivienne Butterfly

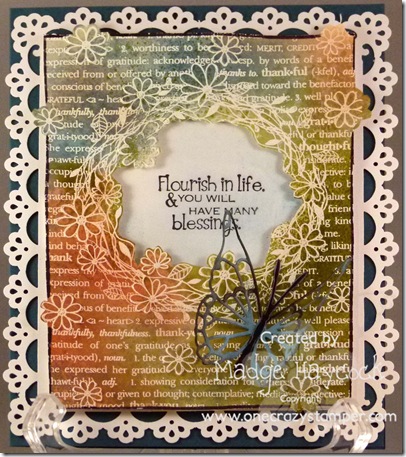
Hi all, Madge here for another Wonderful Wednesday at OCS.  Have you noticed that Lora has a SALE.  Oh my,  so many bargains!P1010680 copy

Today I’ve chosen a Hero Arts “Floral Wreath” Stamp and embossing die set, which I notice that Lora does not have in stock right now.  I stamped the image in Champagne VersaMark, embossed it with white EP, and fussy cut the center. I used a Stylus Blending Tool to blend Tim Holtz Distress Inks (Dried Marigold, Faded Jeans, Rusty Hinge and Shabby Shutter) onto the White cardstock, rubbing off the excess with a kleenex. I stamped the YNS Flourish in Life in black on pale blue cardstock and pop dotted the embossed image over top.  The lace rectangle is a MS round the border punch and the Butterfly is a Memory Box die cut called Vivienne.

Hope you will enter the OCS challenge for the month of October which is Kraft, Black and Red. 

Remember, Stamp up a Storm, Ink up a Wish and send it on to someone to brighten their day!

siggyhaycock

Wednesday, September 19, 2012

Vegans Rock – CA for Whimsy Stamps

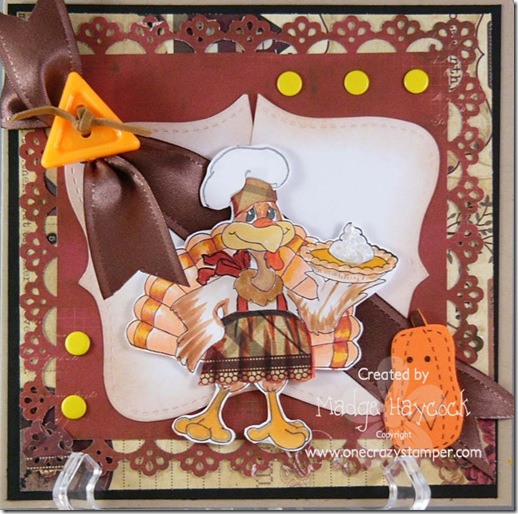
Hi all, Madge here – so it must be Wednesday!!  And a gorgeous and sunny Wednesday it will be here overlooking the lake.   I’ve chosen to use a Whimsy Stamp from the Chrissie Armstrong Collection.  It will be pumpkin pie season very shortly. P1120524 copyHMMmm  one of my favorites.  This image is called “Vegans Rock”, which it has on it’s apron.  I paperpierced the apron and the hat.  No one in this house is Vegan, however I do have a couple of friends that are Vegan.  Maybe the card will make it’s way to their home. 


The image was stamped in Memento Tuxedo Black ink, onto XPress it Blend cardstock, and then colored with Copic Markers.  I paper pieced the apron and hat, and popped the ole’ turkey onto pop dots.

Wednesday, September 12, 2012

Dandelion Girl

Hi all, Madge here for another Wonderful Wednesday for OCSP1120517 copyToday I’ve used a Whimsy Stamp called Dandelion Girl, available at OCS.  We did this very effective stamping technique at our Stamper’s 10 group, courtesy of our very talented SU demo.  It is a Quick, Easy and Effective way to use a variety of stamps.  My format is for a 5 1/2” square card, but it can be adjusted for any size format.
Materials used:  Ranger, Archival Black ink; Xpress It blend cardstock; Copic Markers; colored cardstock, ribbon and punch from stash.
Hope you will join in on the September Challenge at One Crazy Stamper.  (Kraft, Black and Red).
Remember, stamp up a storm, ink up a wish and send it on to brighten someone’s day.
siggyhaycock

Saturday, September 8, 2012

Happy Birthday OCS

Welcome to the One Crazy Stamper Birthday Blog Hop!!!OCS Blog Hop

 Hi all, Madge here for some exciting stuff.  We are celebrating today!  How time flies – the brick and mortar store for OCS is ONE YEAR OLD!  If you’re following along in the blog order you’ve just come from Shari’s blog…….oh my, that gal has talent!!  AND  she is in Bolton, ON celebrating with Lora and the gals!  I am so envious! 
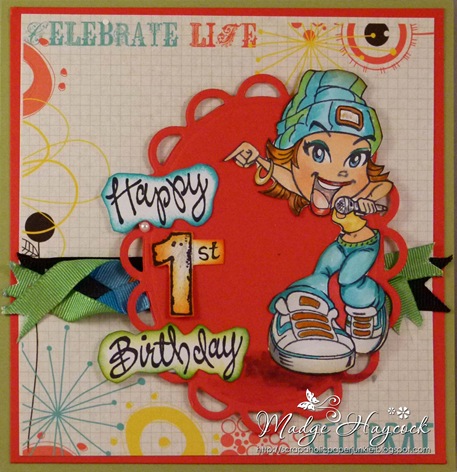
My creation today is a favorite of mine – a Kenny K stamp called Mad SkillzP1010676 copy.  I have discovered a new black ink that stamps like StazOn…..but less mess cleaning stamps, it is Archival Ink from Ranger, stamped onto Xpress It Blend cardstock and colored with copics, it is so brilliant!  To show the difference, look at the Happy Birthday – compared to the image.  See what I mean!!  It can also be watercolored!! 
Join us in celebrating the 1st year anniversary of the brick and mortar One Crazy Stamper! To make sure we don’t leave out our online friends we are having a Blog hop with lots of prizes! To enter to win one of the prizes please leave a comment on each of the blogs in the hop (there are 10 blogs total)  The first stop on the hop is the OCS Design Team Blog, so start there if you are joining mid hop!  Here is the Blog Hop List:
One Crazy Stamper is releasing an exclusive High Hopes Stamp set today. That means you can only get this at the OCS Store. And to celebrate we are giving away 1 of these sets on each of the blogs in the hop! So you have 10 chances to win an exclusive One Crazy Stamper/High Hopes stamp set. Just leave a comment on each of the blogs.  We will choose the winners on 9/10. Here is the set:
One Crazy Stamper-1 copy

To be entered into the drawing please leave a comment here on the OCS blog as well as each of the DT members blog listed below.
Here's the blog hop order in case you get lost:
One Crazy Stamper DT blog
Michelle
Cindy
Lisa
Joni
Sue
Shari
Madge  (you are here)
Jacilynn
Don’t forget - to be entered into the drawing please leave a comment here – and then continue on to our uber-talented DT Leader Jacilynn’s  blog.  Good luck.
siggyhaycock


Thursday, September 6, 2012

Received Birthday “Card”…….

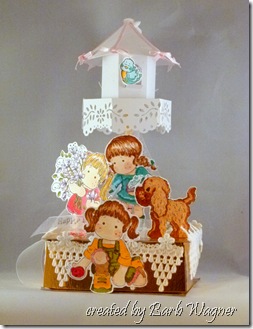
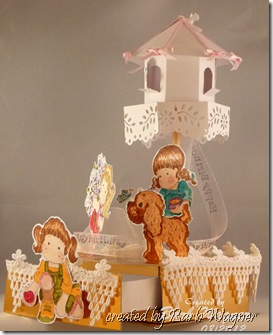
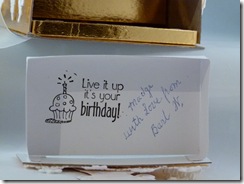
We have a small, but very talented “Stamping Group” in Vernon, and manage to get together to celebrate individual Birthdays.  Well last month was my Birthday (Aug. 26th)….. and the year, well we shan’t tell.   I received numerous Birthday cards (some handmade, some not)…….A very dear friend, who only has the use of one arm due to polio, made this beautiful carousel, with a pull out drawer full of yummieeeeee P1010669minty chocolate (sorry all gone :D). !!! just for me!!!!        P1010673P1010672

I just have to show this!  It is absolutely GOR-JUS.  I tell ya – what makes a girl ever so happy………..  handmade AND chocolate………..!!  I am so blessed to have Barb as a friend.  I am hoping that some of her talent will rub off on me someday.

I am entering this (on behalf of Barb) in the Magnolia-highlights anything but a card Challenge

My friend doesn’t have internet, nor an email……..  (and I have done this without consulting her)…..  I would absolutely love to surprise her with a printout of any comments…..She would be so surprised and love every single one of them.

madge0902 (1)

Saturday, September 1, 2012

Inky Impressions – Hazel Baking Cookies

Hi all,  Madge here for the start of a new month and a NEW CHALLENGE at OCS.  This month Joni has selected a color challenge for us.. Red, Black, Kraft.  The Design Team has come up with some very creative cards!!!  Play along with us for a chance to win some great prizes.  It will be fun to visit your blog and see what you have created.P1120516 copy

After receiving my order of Spellbinders CHA Summer 2012 today, my plans for this card got carried away with using one of the sets.  Amazing how one can get side-tracked with new products!

I started by stamping Hazel Baking Cookies onto Kraft cardstock and then bleaching out the color.  I added some shading with my Copics very sparingly as I didn’t want to contaminate my markers.  The rest is self explanatory – except that I did seal my image with modge podge, thus the darker look.

The products are starting to roll in at OCS – go check the new items out! 


~ Rubber Hugz ~

siggyhaycock

Wednesday, August 29, 2012

Wings of Hope

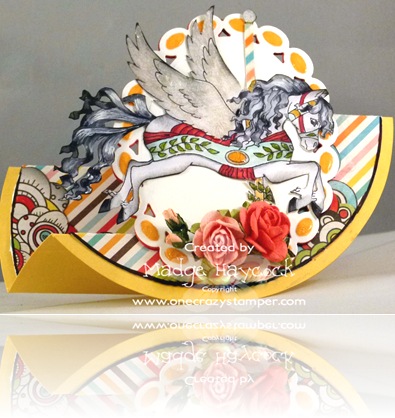
Hi all, Madge here for another Wonderful Wednesday at OCS.  I’ve chosen to make a Circular Stair-Step card today using P1010660 copy“Wings of Hope” from the wonderful Chrissie Armstrong designs for Whimsy Stamps .   I thought I would make the last of the summer-ie cards.  Remember those days of our youth when the Carousel Ride was the only one we could go on.  I do, being the shortest person in our family and the youngest and shortest of all my friends – I was soooo happy when I could graduate to the Ferris Wheel and the Octopus.  Ok, I’m really dating myself.
Materials used:  Wings of Hope;  Xpress it blend cardstock; Ranger Archival Black Ink/ Copic Markers; Spellbinders die, Circle Cutter (6 “ and 5 3/4” circle). Flowers; Paper from stash; Crackle Glossy Accents.
This will be my last post for August – so until next week. Stamp up a storm, ink up a wish and send it on to someone to brighten their day.
~ rubber hugz ~
siggyhaycock

Wednesday, August 22, 2012

Sun Kissed

Hi all, Madge here for another wonderful Wednesday at OCS.  We still have a “Bingo” or TIC TAC TOE P1010633 copychallenge for a chance to win a great prize at OCS. 
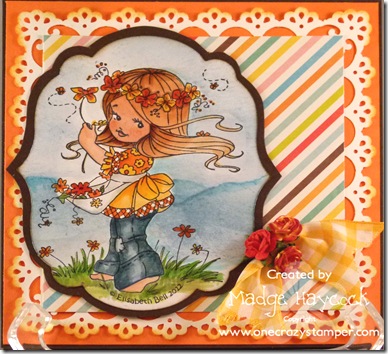
I promised to show more pockets and pages from my A Ladies Diary mini album, however I have a Summery card to share using a Whimsy Stamp called “Sun Kissed”.  I absolutely love these images by Elisabeth Bell – they are so pretty.  With this image, I watercolored a background of hills – because I thought of the song “The Hills are Alive” from The Sound of Music, when I looked at the image.  The image was stamped with Ranger Archival Black ink onto Xpress It Blend cardstock and colored with copic markers
The DPS I used is from Echo Park, Flowers from OCS, punch is MS Round-the-page.
Til next week, Stamp up a storm, ink up a wish and send it on to someone to brighten their day.
~ hugs ~
siggyhaycock

Wednesday, August 15, 2012

A Ladies Diary - part II mini book

Hi all, Madge here for another Wonderful Wednesday at OCS.  Have you played Bingo with us yet for a chance for a great prize from OCS??  If not, head on over and give it a whirl.P1010550

I have another picture to share today of our daughter and her Dad in a friendly game of Backgammon.  You can see why we didn’t really want to leave.

Ok, on with “A Ladies Diary”!  I am still working on the cover, but here is another insert in the mini album.  AND, it happens to fall into a BINGO line.  Pink & Black; Die cut / Punch; Ribbon / Twine.

There are two hidden pockets on the right side.  The far right one opens to display another lady and a photo collage,  the center right pulls up for a fold out of pictures and journaling.  (Sorry – can’t show you for real).

P1010503

Next week I promise – I will be able to show off more of the hidden pockets.    Til next Wed.  “Stamp up a Storm, ink up a wish and send it on to someone to brighten their day”.

~ hugs ~

Madge

Wednesday, August 8, 2012

A Ladies Diary – Continued Series mini book

Still on vacation and even though we were going to be home after a week we decided to stay!  I think it’s safe to say, we are enjoying the Pacific Ocean immensely! P1010559 This picture was taken with a full moon.. .. .. Then there is the daytime with a beach to enjoy to the fullest.  We are at Boundary Bay in Tswassen, and in the backbround is the elusive Mt. Baker, WA across the bay.  I say elusive, because it is very shy – not always wanting to share it’s beauty.P1010570

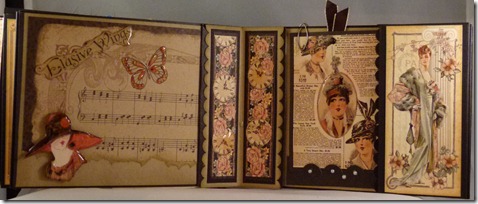
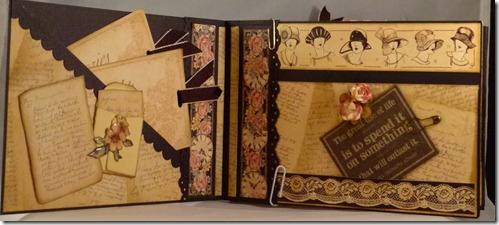
OK, to get on to my post today…….  I was so happy that Lora at One Crazy Stamper added Graphics 45, “A Ladies Diary” to her inventory.  I am such a Shabby Chic / Vintage lover……and this paper is to die for!  P1010497I have put together a paper bag book for a very, very special lady – she is not a Vintage lover, but I’m hoping that this will sway her a bit.  It is a surprise – so, don’t say anything…….lol.  I have put a great deal of work into this mini album, and decided to share two pages of it at a time.  I LUV, LUV, LUV mini books and with “A Ladies Diary” I have made secret hiding places for journaling and notes. I’ve had a lot of fun thinking up little pockets for secrets.  Unfortunately, since I am not at home, where the book is making it impossible to take pics of how the tags and flaps unfold (). 

I have cut  pieces of the paper to add 3D elements to the pages along with flowers.  I apologize for the paper clips, but the pages would not remain open for photographing.

The two tags on the left side pull out; the tag on the right pulls up and the flap on the right opens up for a hidden pocket.  Don’t you just love the flowers and the clocks for the center folds??  I’ve also used glossy accents throughout this album which is shown on the flowers on the left side keeping a tiny envelope and note in place.

Hope this gives you some inspiration to use “A Ladies Diary” .  Remember, Stamp up a storm, ink up a wish and send it on to someone to brighten their day.

~ hugs ~

Madge