Friday, January 25, 2013
Tilda with Ribbon Heart Scarf
Wednesday, January 23, 2013
"Kaydance"
Short and very late wonderful Wednesday post for today due to unexpected circumstances. I've used an Elizabeth Bell stamp from OCS called Kaydance.
Materials used: Xpress It blend cardstock, Copic Markers, Memento, Tuxedo Black Ink, Whimsy Stamp "Kaydance"SEI dp, MS border / corner punch.
Take care til next time.
Madge
Wednesday, January 16, 2013
Kraftin' Relaxes Me! Can You Relate?!
- Let's Craft and Create - anything goes
- Pin and Tack: Spark Your Creativity
- Favorite things ~ (Copic Markers)
Sunday, January 13, 2013
Happy Tilda
Here I am for a second card for the day!! woohoo! The card is for another January Birthday to be mailed, thus the minimal embellishments.
I had colored this image a very long time ago, but decided that there are actually a lot of people who love the snow and it makes them happy. (I remember being at a very popular Ski Resort on the first snowfall, to wake up to people dancing and singing in the street). My daughter and I joined in until the wee hours of the morning.
The image is "Happy Tilda". I have popped her up and have her stepping out of the frame. The background has been embossed with white snowflakes and sponged with Concord Distress ink, then stamped with a script stamp.
Tilda with Skates
- XPress it Blend Cardstock;
- Copic Markers;
- Magnolia Stamp "Tilda with Skates" **;
- White Embossing Powder;
- SU Snowflake Stamps;**
- Snowflake Border Punch;**
- Script Stamp (Hero Arts)**;
- SU Lovely Lavender C/S;**
- Sakura Glitter Pen;
- Tim Holtz "Concord" distress ink;
Wednesday, January 9, 2013
Thank you Collages
Since this is my first post for the New Year it is only fitting that I wish you all a Very Happy New Year with Good Health and much Prosperity.
Today I've chosen to show a couple of Thank You Notes that I made for hostesses over the holiday season. I used Whimsy's "Time Flies" available at the OCS Store.I used Watermark Stamp Pad and Gold Embossing Powder to stamp the graduated layers of Vanilla cardstock. All pieces were sponged with Frayed Burlap to add further dimension and matted with gold and black. Extra embossed clocks were cut out and popped onto the front of the cards for Dimension.
For the second card I added one more layer, and added a double red organza bow with a black brad for the center.mounted onto a clock popped up with pop dots.
Hope this gives you some inspiration to add
to the "Anything Goes Challenge at One Crazy Stamper" We'll be looking forward to seeing your entries.
Wednesday, December 19, 2012
Have a Jolly "Holly" Christmas
I've chosen the beautiful Whimsy Stamp, "Holly" - available at OCS and turned her into a Nugget Candy Card filled with a Hershey's Nuggets surprise for a very sweet friend. This is #9 with three more to make before "the big day". These will be hand delivered - unlike two that were mailed! Yikes, that was expensive!
I Stamped the image with Memento Tuxedo black ink onto Xpress It blend Cardstock and colored it with my favorite medium.....copic markers. Cardstock layers are from a stash of paper scraps that I have been neglecting to use. (I won't bore you with details).
Whimsy's "Holly" stamp; Copic Markers; Memento Tuxedo Black ink;
I apologize, but once again my links do not seem to be working without giving me an error message...... grrrrr.
I want to wish all of you A Very Merry Christmas - from our house to yours. See you here next week.
Tuesday, December 11, 2012
Dress it up or Dress it down
The only stamping involved is the Merry Christmas sentiment.
Die Cuts are Memory Box Dies, which are overlaid. I used double-sided tape on the ornament base, added Glitter Ritz glitter and pressed the overlay on top. I did the same for the silver edging. More frugal than purchasing those expensive sparkle sheets.
Until next time. hugz, Madge
Monday, November 26, 2012
Krafty Kate
Hi all, Madge here with a project using "Krafty Kate" How appropriate for that "crafty person" on your card list any time of the year!
Materials used: Xpress It Blend Cardstock; Tuxedo Black Memento Ink; Tim Holtz, Brushed Corduroy Distress Ink; Copic Markers: R00, E11, R20, W0, W2, Y26, Y28, R39, R22, YG91.YG93,YG95,YG97, BG00; White gel pen; Ice White Viva Decor Pearl Pen; Spellbinders, Lables 23; Papers from BoBunny "Noel" collection. Buttons, snowflake punch and ribbon from stash.
I am entering the following challenges:
Papertake Weekly challenge - Ribbons and Pearls
TTCRD 46 - anything goes
Challenges 4 Everybody - anything goes
Loves Rubber Stamps - anything goes
Wednesday, November 21, 2012
Whimsy's Holly
Hi all, Madge here for another Wonderful Wednesday. I was very reluctant to post my project for this week as Shari (our Terrific Tuesday girl), did a absolutely marvelous project using the same image. (We both have excellent taste - !! Amazing how two images the same can turn out so differently.
I stamped my image on Copic Xpress It Blend Cardstock, with Tuxedo Black Memeno ink, colored it with copics and die cut the image. Barn Door distress ink was sponged onto the die cut to give it a bit of color. I also added some machine sewing and then sponged on Versamark and applied White Embossing Powder.
Materials used:
Holly from Whimsy Stamps
Xpress It Blend Cardstock;
Memento Tuxedo Black ink
Copic Sketch Markers
Tim Holtz Distress Ink (Barn Door)
White Viva Decor pen;
Spellbinders and Memory Box dies
White Embossing Powder
Happy Stamping!
Wednesday, November 14, 2012
Choppers in Motion Tutorial
Hi all, for another Wednesday at One Crazy Stamper. Since it is my turn to post a tutorial for the OCS DT, I have chosen to show you what I did to create a "motion" scene.
I am using a High Hopes stamp called "Choppers Chillaxin" available at One Crazy Stamper for an insanely low price, as are all One Crazy Stamper's items.
Here is my finished card. I kept it very simple with layers and a few embellishments.
Now, on with the Tutorial.
1) Stamp your image on far right or far left of piece of white Cardstock (depending on where you want your image to finish up).
2) Stamp your image onto a Post-it Note making sure you stamp on the top side of the sticky part. (this will allow you to temporarily adhere your mask to the stamped image.
3) Cut the right or left side of your mask depending on which side you want your image to come from. No need to be perfect - just a "roughy cut outside the lines".
4) Place your mask over your stamped image.
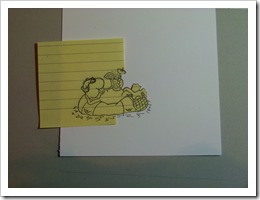
5) There is no need to re-ink your stamp for your second image - just "huff" on the ink to refresh it. Stamp your second image. I didn't align my images as I wanted them to appear to move and jiggle up and down with the motion of the waves.
6) Stamp your image for the 3rd time - huffing on your stamp once again. The image does not have to be "all there", it should be just a blur.
7) Proceed to color your image. The first image you stamped will be in full color.
The second image will be in lighter, and the third image will be a "blur of color", very pale in comparison to the first image.
Here is a larger version of my finished card. I kept the embellishments very simple and purposely rough cut around the image and placed it tilted on the paper to give the illusion of bouncing around on the waves.
I hope you've enjoyed my tutorial, if you have any questions, feel free to email me.
Materials: High Hopes Choppers Chillaxin stamp, Memento Tuxedo Black ink, Xpress It Blend cardstock, Copic Markers: Water; B000, B02. B97, B95 Chopper; E47, E39, E15, E70, E71 Tube; YR000, YR21, YR12, E11, YR38, R08, R14
Thursday, November 1, 2012
Silver Fairy
I am entering into the following challenges:
Anything Goes Challenge 79 - Anything goes
Whimsy Inspiration Challenge - All Things Sparkly
Totally Stampalicious - anything-goes
Fab n Funky - die-cuts-punches
Stamping For The Weekend - Anything Goes
Taking the Pixie Dust Challenge - Leaves

