
Hi all - I can't believe we are at Whimsy Newsletter #6.
I have another tutorial for you today in the form of a "Break-a-way" card. I've done a couple of different versions of it here and here, for the tutorial in the past. Today I'm going to show you a different card using "Sympathy Bugs" by Silvia Zet. I prefer to call them Cuddle Bugs because they are just tooooo cute.

When the card is pulled open - here is what you see.
Card size: 6 1/4" x 4 3/4
Materials: Xpress It Blending Card (3 7/8" circle - sponged with TH Distress ink "Stormy Sky" and "Picket Fence".
Memento Tuxedo Black ink,
Copics: Bugs: E11, E13, E17, E19; Leaves: YG91, YG97, G99; Wings: RV91, RV93
Sakura Starburst Pen (wings); Glossy Accents - wings and antennae of bugs. DSP: Webster's Pages; Flowers - Whimsy Buds and from Stash; Spellbinders Scalloped Circle die, Cardstock - navy and Midnight Muse.
For the my card measuring 6 1/4" x 4 3/4" the following pieces were cut:
4 - 3 1/8" x 4 3/4" (navy),
DSP 6" x 4 1/2",
runner: 5 3/4" x 2 1/4" (navy)
Sentiment mat: 5 3/4" x 3 1/4" (navy)
Sentiment: 5 1/2" x 3" (white). 4 - 1" circles
Adhesives: Dimensionals or foam tape, 2 large glue dots.
Punches: SU Word Window Punch, 1" circle punch, MS Fern Punch.
Tutorial and Pictures to follow shortly

2. Draw a pencil line to mark the cut lines from the image,
3. Stamp image onto lightweight computer paper or Post It note. Cut out.
Use repositionable tape to place over top image. Sponge with TH "Stormy Sky and Picket Fence".

4. Cut image into desired shape (3 7/8" Circle)
 5. Carefully cut image apart.

6. Cut mat for image.
7. Remove one side of cut image and draw a pencil line on the cut edge of the image.
(changing to orange so the pencil lines will show. this will be your runner piece.)

8. Draw a line 1/4" from each edge of runner and lengthwise down the center.

9. Line up the end of the SU Window Punch at edge of 1/4" line and centered along the center line. Punch at left and right side.

Your runner will now look like this.

10. Place a dimensional in center of two of the circles or flowers.

11. Slip the circles or flowers under the runner so that the dimensional pops out of the window slot.

12. Remove backing from dimensional, line up #3 and #4 and adhere. Make sure the circles or flowers will move easily.

13. Place foam tape at the spots marked 1 - 6. Place split image to get the center closing mark and place the foam tape about 1/8" away from edge.
(This is where my camera battery gave out) Be back soon.. Funny how pictures don't turn out when the battery dies.......lol
14. Remove the backing from the tape on the runner


16. Attach your decorated split fronts to the backs, aligning the edges and making sure that the split is clear of any tape.

While I had my card apart for filming - I decided to change the sentiment. (the other one mentioned a hug with a fold in the middle........ no folds in this card.
Hope you could follow my tutorial. Next week I will be showcasing one of the newest Whimsy releases for March.
In the meantime - stamp up a storm, ink up a wish and send it on to someone to brighten their day.

I have another tutorial for you today in the form of a "Break-a-way" card. I've done a couple of different versions of it here and here, for the tutorial in the past. Today I'm going to show you a different card using "Sympathy Bugs" by Silvia Zet. I prefer to call them Cuddle Bugs because they are just tooooo cute.

When the card is pulled open - here is what you see.

Card size: 6 1/4" x 4 3/4
Materials: Xpress It Blending Card (3 7/8" circle - sponged with TH Distress ink "Stormy Sky" and "Picket Fence".
Memento Tuxedo Black ink,
Copics: Bugs: E11, E13, E17, E19; Leaves: YG91, YG97, G99; Wings: RV91, RV93
Sakura Starburst Pen (wings); Glossy Accents - wings and antennae of bugs. DSP: Webster's Pages; Flowers - Whimsy Buds and from Stash; Spellbinders Scalloped Circle die, Cardstock - navy and Midnight Muse.
For the my card measuring 6 1/4" x 4 3/4" the following pieces were cut:
4 - 3 1/8" x 4 3/4" (navy),
DSP 6" x 4 1/2",
runner: 5 3/4" x 2 1/4" (navy)
Sentiment mat: 5 3/4" x 3 1/4" (navy)
Sentiment: 5 1/2" x 3" (white). 4 - 1" circles
Adhesives: Dimensionals or foam tape, 2 large glue dots.
Punches: SU Word Window Punch, 1" circle punch, MS Fern Punch.
Tutorial and Pictures to follow shortly
- Choose image that can be split in half - stamp onto white cardstock

2. Draw a pencil line to mark the cut lines from the image,
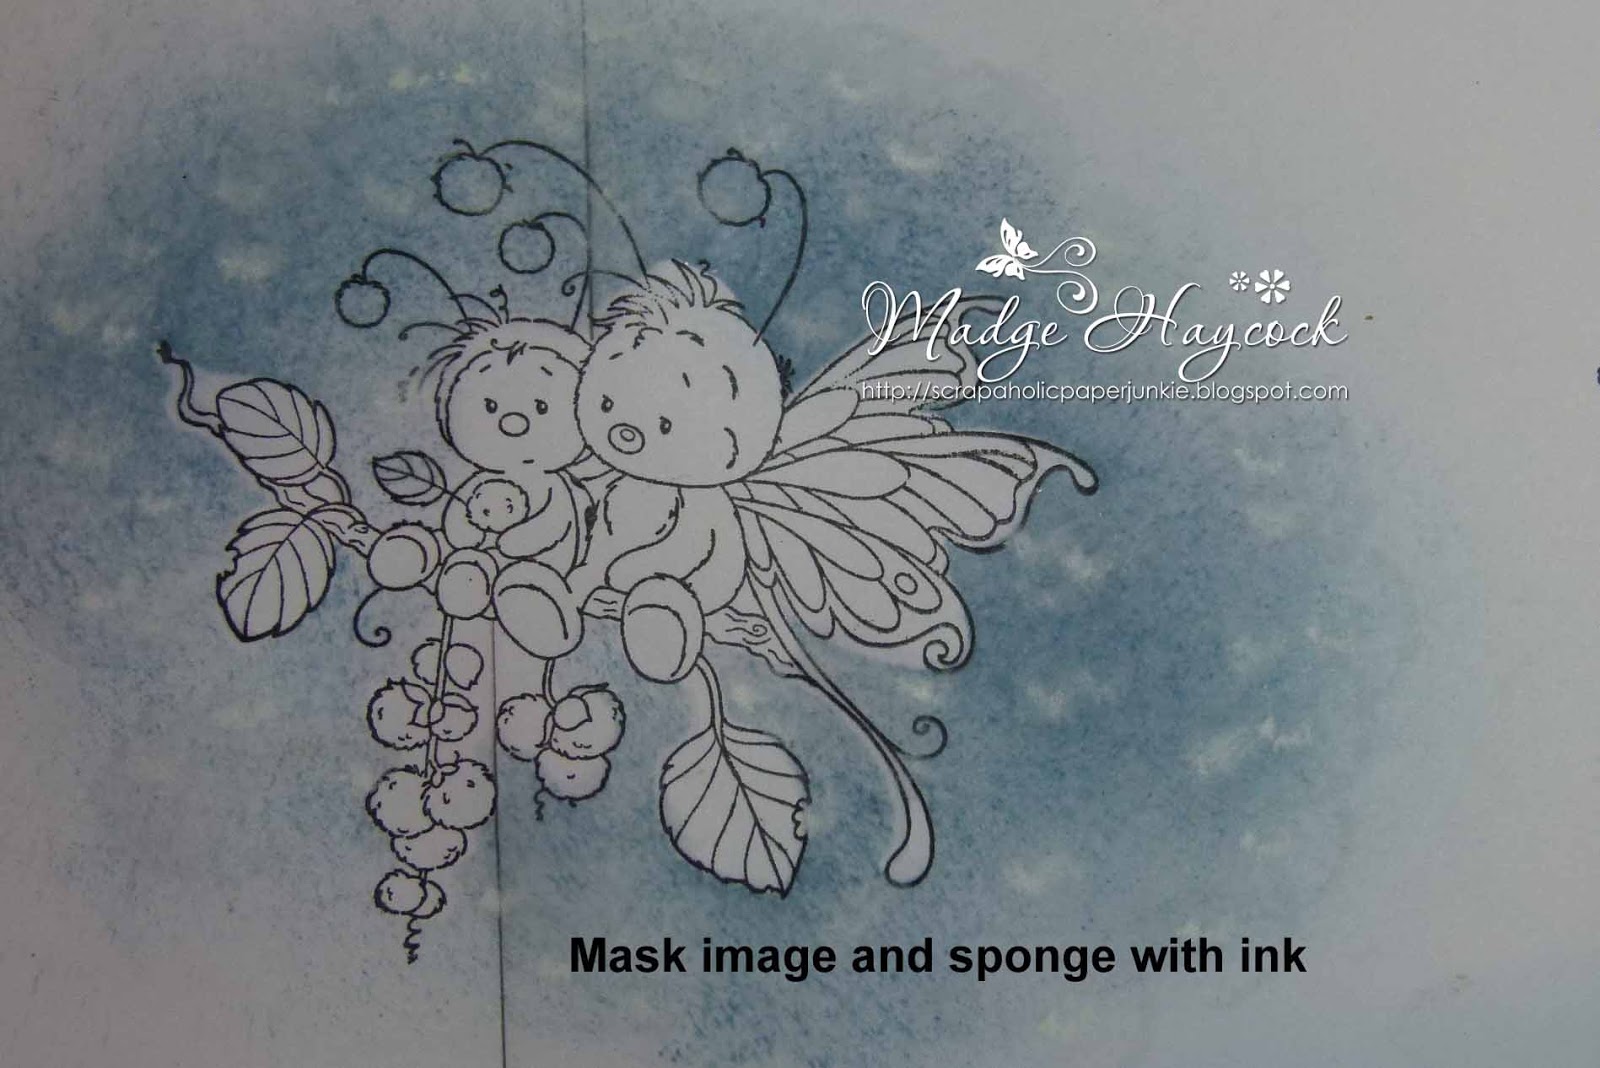
3. Stamp image onto lightweight computer paper or Post It note. Cut out.
Use repositionable tape to place over top image. Sponge with TH "Stormy Sky and Picket Fence".

4. Cut image into desired shape (3 7/8" Circle)
5. Carefully cut image apart. 
6. Cut mat for image.

(changing to orange so the pencil lines will show. this will be your runner piece.)

8. Draw a line 1/4" from each edge of runner and lengthwise down the center.

9. Line up the end of the SU Window Punch at edge of 1/4" line and centered along the center line. Punch at left and right side.

Your runner will now look like this.

10. Place a dimensional in center of two of the circles or flowers.

11. Slip the circles or flowers under the runner so that the dimensional pops out of the window slot.

12. Remove backing from dimensional, line up #3 and #4 and adhere. Make sure the circles or flowers will move easily.

13. Place foam tape at the spots marked 1 - 6. Place split image to get the center closing mark and place the foam tape about 1/8" away from edge.
(This is where my camera battery gave out) Be back soon.. Funny how pictures don't turn out when the battery dies.......lol

15. Place the matted sentiment onto the runner. With the matted sentiment in place, adhere rows of foam tape along the top and bottom of the matted sentiment. Snug it up to the mat.

16. Attach your decorated split fronts to the backs, aligning the edges and making sure that the split is clear of any tape.

Hope you could follow my tutorial. Next week I will be showcasing one of the newest Whimsy releases for March.
In the meantime - stamp up a storm, ink up a wish and send it on to someone to brighten their day.


