Sunday, October 31, 2010

Bewitching Tilda

I'm entering this card into the paperplay for the " A Haunting we will go challenge.


This is my one and only Halloween card that I made for this year which will be hand delivered tomorrow.  I don't usually get too thrilled making cards for this occasion - the desire to dress up and party has disappeared:(


A friend of mine makes booootiful Halloween cards -- but then again, she has all the stamps to fit the occasion ..
My new little Witch Tilda, which can be purchased from Magnolia-licious, came to the rescue.  Diana seems to be sold out of this particular witch, but there are soooooooo many others to chose from and if you ask her nicely, she'll order it for you.


Tilda's been coloured with copics and dusted with perfect pearls to make her "green".  I made this into an easel card, and popped the Martha Stewart punched fence on to stick out from the rest of the card. then added glue and perfect pearls to look like skeletons hanging from the fence posts and glossy accents to the pumpkins to make them glow.
The background paper started out as yellow then I stamped it and started adding orange, purple and black.  The haunted house is a Stampin' Up set, which I have used again and again.
Hope you like it.

Remember, stamp up a storm, ink up a wish - and send it on to brighten someone's day.    

Rubber hugs, inky wishes, Cricut chirps and Cuttlebug squishes,
Madge

Sunday, October 24, 2010

Mojo Monday Sketch 161

This may just squeak into the deadline for Mojo Monday Sketch #161 which can be found   here.


I found this little Magnolia  in a garage sale and need a name for her??

Here's hoping someone can identify her and  help me put her in alphabetical order in my case.
I managed to use a couple of sadly neglected items for this card.  Some Designer paper from My Mind's Eye, little mulberry flowers, and a spellbinder's edger.

Copics used:  Jacket: BG72; BG75; BG78
                         Pants &; Shoes:  E13; E17; E39
                         Skin:  R00; E01; R20
                          Hair:  E70; E74; E77
                          Flowers:  YR12; YR68; Y13

Martha Stewart "Sunburst" Border Punch
Cardstock:  Chocolate Chip, Hunter Green and Blush Blossom (SU)

Hope you can help me with Tilda's name.  Thank you for making the time to leave a comment, they are greatly appreciated.

Remember, stamp up a storm, ink up a wish and send it on to someone to brighten their day.

Rubber hugz, Inky wishes, Cricut chirps and Cuttlebug squishes,
Madge
aka:  maddie6833

Thursday, October 7, 2010

Sparkle and Glitter Dinner Tilda


I have been working on my little "Tilda" project for about a week, and finally completed her.  The Spellbinders Nestabilities "Labels Seven" available at Lora's (Canadian) online store, which have been in my case for over a year finally got used.


I decided upon an Easel card using iridescent white for the pages and shaded them with Tim Holtz Antique Linen, to give  depth. Dinner Tilda, which is available at Magnolia-licious was coloured with copics: B91; B93; B95; R00; R20; E00; C01; and a white glaze gel pen for the pearls and shoes.  Icy Stickles were used to add some bling to the silk flowers, ribbons, beads and the little flowers inside.  I wrote a very tiny letter on the book page, picturing Tilda writing in her diary while waiting for Edwin to take her out to dinner.


The inside is another Magnolia stamp available at Magnolia-licious. I used the EK Success punch for the scrolls and flowers and Martha Stewart's Sunburst border punch for the sentiment and for the outside decorations, distressing the edges with SU Pretty in Pink.

I am entering this in the following challenges:
"Totally Tilda  Glitter and Sparkle Challenge #6" 
" Mojo Monday Sketch 159"
"Secret Crafter Challenge #103", which happens to be an easel card challenge
"Stamptacular Sunday Challenge #79" - Layer it on!


Hope you like it, and will take the time to leave  a comment - it is always enjoyable knowing that someone appreciates the work they see.

Remember, "Stamp up a Storm, Ink up a Wish and send it on to brighten someone's day"

Rubber hugs, Inky wishes, Cricut chirps and Cuttlebug squishes,
Madge
aka: maddie6833

Monday, August 16, 2010

Mojo Monday Challenge #152

Another Monday and another Mojo Monday Sketch Challenge.Mojo152Sketch  I need another masculine card and thought that I would combine Sketch  152 and my most recent Greeting Farm stamp.  I know,

P1000341
this is a masculine card, so what’s with the flowers??  Well the recipient of this card loves flowers – that is in the garden, tending to them, watching them grow and I swear sometimes it appears that he even talks to them to encourage them to flourish.  So, in this case the flowers were an added touch.  The little fisherman – well, that is because he also loves fishing (he would prefer catching, but he keeps fishing). P1000346
The fish are little buttons from my stash – that I’ve had kicking around for years.  I decided to hang them from loops on the cord with glue dots, and then I covered them with glossy accents to keep them in place forever.
On the inside I’ve pasted a piece of the plank dp and will write a sentiment with markers to appear like graffiti.
Most of all, I had fun making this card. I am so in love with my copic markers that I find it hard not to use them on every card I’ve made recently!  They say practice makes perfect…….. well, in my case I just hope to improve.
If you’re stopping by to take a peek, please leave me a comment (good, bad or indifferent). I love to read them and they are greatly appreciated.
Remember, Stamp up a card, ink up a wish, and send it on to brighten someone’s day.
Rubber hugs, inky wishes, Cricut chirps and Cuttlebug squishes,
Madge
aka:  maddie6833

Thursday, August 12, 2010

A Card for my little Angel


Birthdays are always special and this one is no exception – it is for a little girl who I will always call my P1110522little Amy-kins.  I’m allowed because I’m her gramma, and she loves me and tolerates me. 

A friend sent me an image of Tilda Blowing Bubbles and I just had to use it for this Birthday Card.  The Sentiment says, “May your day bubble over with fun!!”  I cut the image out and mounted it onto a white background embossed with my new Stampin’ Up folder.  Then I lightly rubbed a dauber inked with Bashful Blue across the raised embossing.  Different size circle punches were used to make “bubbles”, which I added glitter to, making them iridescent.

I used my copics to colour Tilda, using Blue and a bit of Violet to shade.  I really love the results.  Then I added more glitter to the dress and wings by P1110518feathering the glue pen and sprinkling glitter over it.

The card is an easel card which I just love to make – the formula for whipping them up for any size is so easy once yoP1110520u master it and allows the card to stand for display while the sentiment inside remains hidden. 

I found some white flowers in my “stash”, and coloured them by spritzing them with alcohol, (no, not the drinking kind) and colouring them with my copics.  The alcohol makes the “bleeding” so perfect.

I had this card in my mind for Amy-kins – and for once, everything fell into place making it easy to put together.

Hope you like the card and thank you in advance for taking the time to leave a comment – they are always greatly appreciated.

Rubber hugz, inky wishes, Cricut chirps and Cuttlebug squishes,

Madge

aka: maddie6833

Tuesday, August 10, 2010

Birthday Boy

Our oldest son's Birthday is on the 15th of August.  Since this has to be sent, I'm posting it early - I'm sure he doesn't check his mom's blog therefore I'm relatively safe in not spoiling the surprise.

This little stamp is from The Greeting Farm - and he is just soooooooooo sweet.  DH and this son just returned from a fishing / bonding trip.  They both had fun and enjoyed the two days time away from the every day happenings.

I happened to have this stamp already and when I took a Copic class recently this is one of the images that we had to "practice" on.  LOVE my copics!!  Here is a close-up.    It will be hard to get back into "normal" card making in September after having such fun with Magnolia Stamps and little fellas like this one.

Hope you like the card.  Comments are always greatly appreciated.

Rubber hugs,
 Inky Wishes,
Cricut chirps &
  Cuttlebug squishes,
Madge

Wednesday, August 4, 2010

Mojo Monday Sketch # 150

This week is the Mojo Monday Contest week, for a chance to win a stamp set from Verve Stamps.
Julee Tilman has some wonderful stamps and her customer service rocks!!

A friend has a Birthday this week and to kill two birds with one stone - I created her card around the Mojo Monday sketch.  It's a very "basic" card as this friend does not like fussie or frou-frou.  I would have loved to make a Magnolia Tilda card and gussied it up with lace, flowers and ribbons, but slapped my hands and kept to the basics.  Even this may be a little fussy for someone who likes plain, no fuss, no muss....... lol 

The patterned paper is from Basic Grey; the stamp from Sunshine Designs; leaves are cut with my Cricut.  The "bling" at the bottom of the card are self-adhesive  holographic micro dots.  Bling with no bumps  (lol).  Even though this card is just going down the street and not being mailed, I had to keep to the plan.   (plain-jane).

Hope you like it and remember to Stamp up a Storm, ink up a wish, and send it on to someone to brighten their day.

Rubber hugs, inky wishes, Cricut chirps and Cuttlebug squishes,
Madge

Monday, July 26, 2010

Just Magnolia week 65 Vintage Challenge

My card came about for the challenge over at Just Magnolia which is "Vintage" and for the 

  I found a link to make flowers with a Cricut Cartridge and this was my first attempt - It is big, but not bold.  I thought it looked very "vintagy".  

I love this little Tilda holding eggs and decided to use her in the challenge.  Diana at Magnolia Stamps appears to be out of this stamp, but if you ask her nicely, she will order it in.  

 
I usually go much more distressed for a Vintage look, but felt with the large flower this was a good balance.  Still not quite absolutely positively sure about the flower, but it is glued down so I will have to keep it for now.


Here are the supplies I used to make the card.
  • Spellbinders Label Four
  • Tim Holtz Distress Ink  (walnut stain) and (antique linen)
  • Basic Grey  (Cappella paper pad) Love the colours!!
  • Momenta (Story About Me collection) paper
  • SU cardstock for base of card
  • Copics:  
    • Skin:  R00; R20; E11
    • Hair:  E11; E13; E17; E57
    • Dress and Socks:  B91; B93; C1
    • Shading:  C1
  • Lace Strip:  Martha Stewart Lace Edge Border punch
  • Flourish:  Cricut Storybook cartridge
  • Flower:  Cricut George cartridge;  paper scraps; Stickles; Tim Holtz Antique Linen distress ink.
I cut and embossed the image with Spellbinders Label Four and distressed it with Walnut Stain distress ink.  I also distressed the papers with the same ink to give it a  vintage look.

I'm looking forward to taking a copic class at the beginning of August  - I'm really wanting to learn how to use them to get the fabulous results that I keep seeing.  

The inside of the card doesn't have a sentiment added because I haven't decided what to use yet.  I have decorated it with a vintage rose paper scrap using the MS Lace Border punch and MS Butterfly.

Hope you like the card - Remember, Stamp up a Storm - Ink up a Wish and send it on to someone to brighten their day.

Rubber hugs, inky wishes, Cricut chirps and Cuttlebug squishes,
Madge
aka:  maddie6833


Tuesday, July 20, 2010

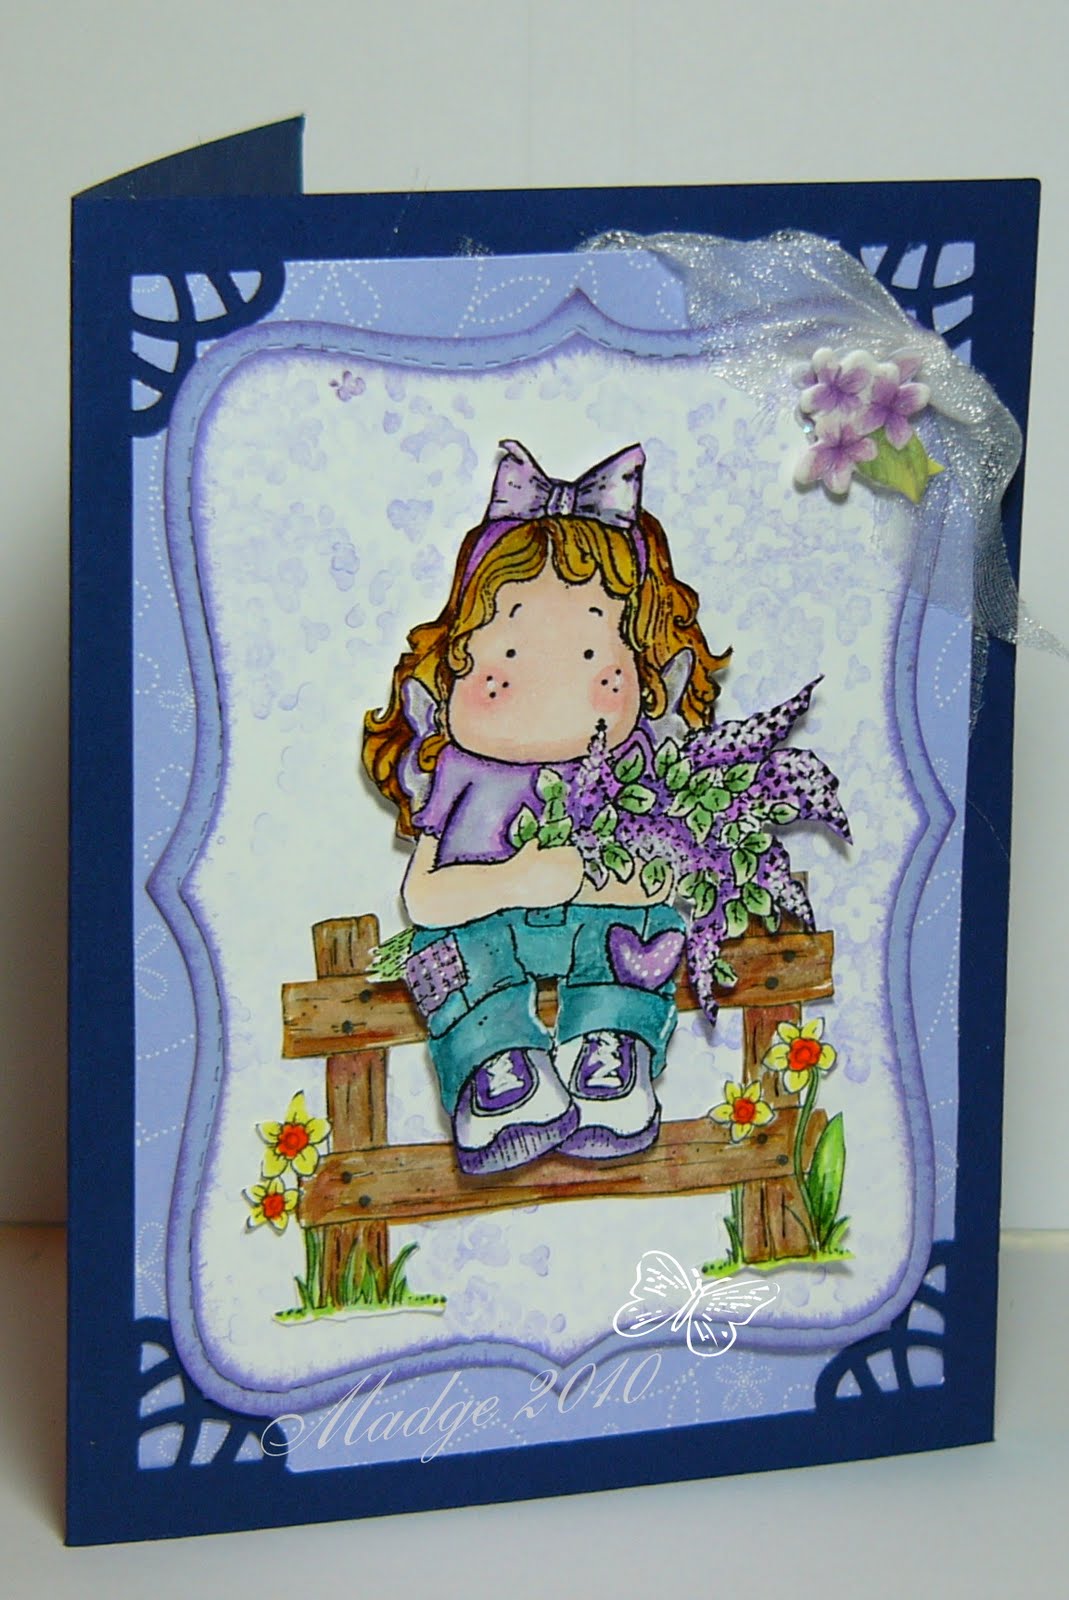
Tilda Holding Lilacs

Monochromatic Madge has struck again!!  

It is so easy to slip into the comfortable, safe and sometimes boring monochromatic state.  I envy those of you who can intermingle colours and patterns to get  absolutely marvelous results.  When I try, it looks like yesterday's breakfast left on the counter overnight.


This is another card that has to be mailed for a swap, thus it is no thicker than 1/4" -   I  try not to make them entirely flat, but I try to keep it thin enough to slip through Canada Post's mandated slot (which, I believe gets thinner and thinner after the postage lurches up that incredible penny every year).

A friend sent me the image of "Tilda Holding Lilacs",  so I just had to colour her up.

(Diana, at  Magnolia-licious  has it in stock right now)

Lavender, lilac, mauve, and  light purple all favourite colours of mine - even though nothing in my wardrobe is any of the above.

I used copics to colour Tilda and "The Spring Fence",  cut them out and popped Tilda onto the fence with 3D tape.   I stamped off the SU " Blossoms Abound" stamp onto the white SU top note die cut  with Lovely Lilac and sponged the edge to pop it off the  Always Amethyst top note, also sponged with Lovely Lilac.  The DP is also SU.  The ribbon is  iridescent white, knotted and tucked under the DP and the flowers are a 3D sticker found in my "purple" stash drawer

Hope you like it - I appreciate each and every comment left and hope you will take the time to leave one.  

Remember, Stamp up a Storm, Ink up a Wish and send it on to someone to brighten their day.

Rubber hugs, inky wishes, Cricut chirps and Cuttlebug squishes,
Madge

Thursday, July 15, 2010

Dinner Tilda


Isn't it funny how cards happen. A friend recently had a Birthday and I had an idea for a card.......the paper, the stamps, the layout and the template all came together -- until it came to putting the elements together, then the original idea went astray. The card was meant to be an easel card, the stamped image didn't fit into the portrait plan, so had to be switched to landscape..... the papers were a little too bright for the intended image, the layout - well it changed because of the paper. To make a long story short, I ended up with a card that was never intended to be.

I used copics to colour Dinner Tilda, available here. It appears that Diana is out of stock on this particular stamp, but will be more than happy to order it for you if you absolutely need it.

I cut the image out and mounted her on a 3-D ribbon sticker.  I used dollar store flowers, which were white and coloured them by spraying them with alcohol and using copics to get the shading. The stamens are little stamen clusters bought on another sprig of flowers at the same $$ store.  The leaves are a prima flower, which I separated and glued down to make leaves.  I cut the border on my cricut, using design studio along with the border around the frame.  After I mounted Tilda in the circle, I decided to shade with Copic C-1 to make the image appear to be shadowed.  I'm rather pleased with the way the card turned out considering that I had a totally different plan for it to start with.

Remember, "Stamp up a Storm, Ink up a Wish, and send it on to someone to brighten their day.

Rubber hugs, inky wishes, Cricut Chirps and Cuttlebug squishes,
Madge

Wednesday, July 7, 2010

Mojo Monday Sketch 146

Another Mojo Monday Sketch contest and a chance to wiln a stamp set!  Well, any stampaholic can't pass up a chance to add a stamp to her already daunting collection!


Here is the sketch we had to work with.    I'm sitting at the lake with only Magnolia stamps - so guess what I had to use...............  Midsummer Tilda . She is coloured with copics.  Just love the results of those little markers. 
Hope you'll leave a comment and tell me what you think.  Stamp up a Storm - ink up a wish, and send it on to someone to brighten their day.

Rubber hugs, inky wishes, Cricut Chirps and Cuttlebug squishes,

Madge

Thursday, July 1, 2010

Tilda with Violin - 2nd post

Here is another Tilda with Violin card, made for a stamping friend who plays the Violin (also known as "ANNABLER".....lol  I give her such a bad time about getting me hooked on these sweet little stamps,  but I also thank her for opening my eyes.


Copics added a touch of colour to this Tilda, but I left the majority of the dress untouched to keep it pure white.  I used the same musical note sticker paper on this one as my previous post,  some polar white Flower Soft for the wings and layered some prima flowers with stamens from some faux silk flowers I had on hand.


The inside is decorated to finish off the card.

Remember,  Stamp up a storm, ink up a wish and send it on to someone to brighten their day.

Rubber hugs, inky wishes, Cricut chirps and Cuttlebug squishes,
Madge
aka:  maddie6833